Side French Braid tutorial with video
 Braids are still all the rage and although I used to think they were too complicated, I learned how to make the easiest side French braid. Thanks to a collaboration with Johnson’s No More Tangles, my daughter and I have been testing out new hairstyles because after a while we were both tired of the same ponytails or braids. Even though my daughter is the family’s official hair expert, I decided to learn and try new braids. It was totally worth it! Here’s the video tutorial so you can do your own side French braid.
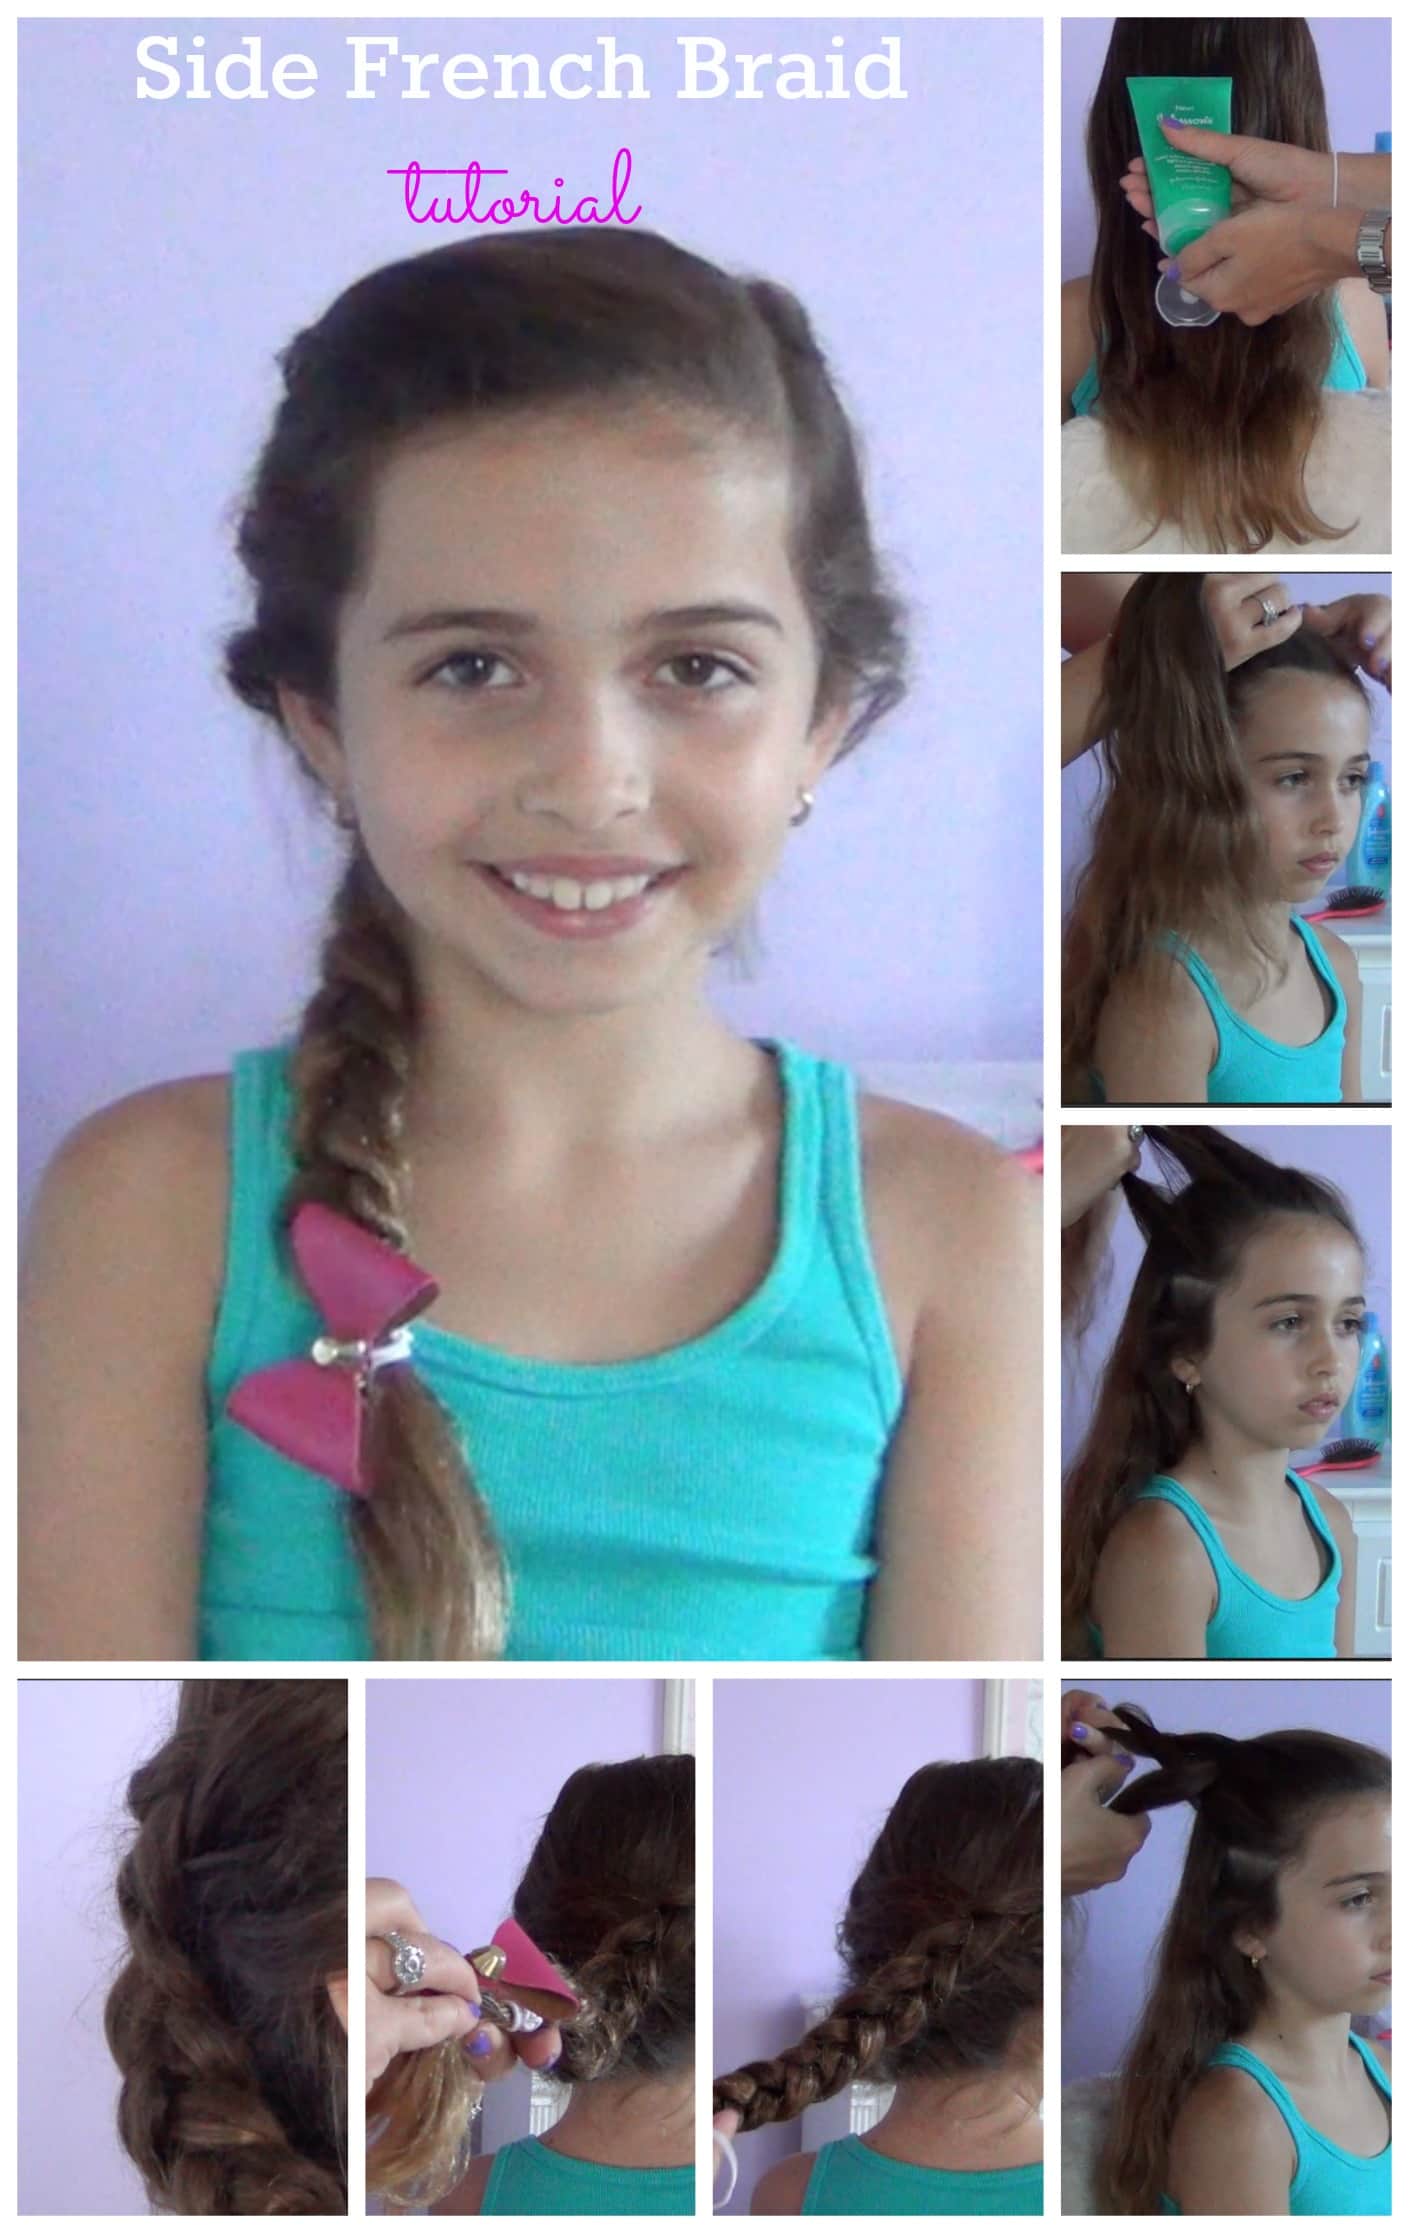 Here are the instructions, step by step:
- Wash and detangle hair. We used Johnson’s No More Tangles shampoo & conditioner, and once my daughter’s hair was dry we used the Detangling Spray and Leave In Conditioner.
- Start on the right side and take a wide subsection of hair close to the forehead. Split it in to three smaller sections.
- Begin braiding. Instead of crossing your strands over the middle piece, you will be crossing it under, creating a Dutch Braid.
- Take a section of hair from the right side and add into your right section. You will cross this section of hair under the middle strand.
- Take hair from the left side of the head and add it into your left section crossing it under the middle. Make sure to use a comb to smooth out the hair that is going in the left section.
- Continue these steps and braid all the way down staying as close to her hairline as possible. Continue braiding until you no longer have any hair to braid.
- Add a hair tie at the end to secure braid.
If you’re looking for more ideas, here are other hair and braid tutorials:
Disclosure: I am collaborating with Johnson’s® No More Tangles ® on a video and blog campaign, for which I am receiving compensation, but all opinions reflect my thoughts.