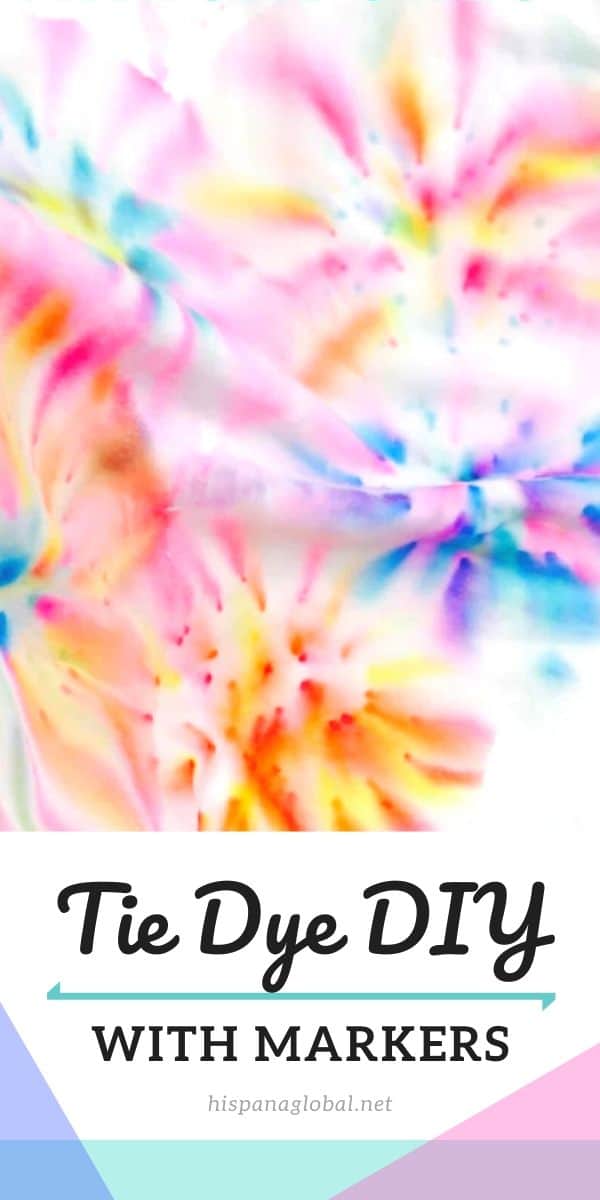
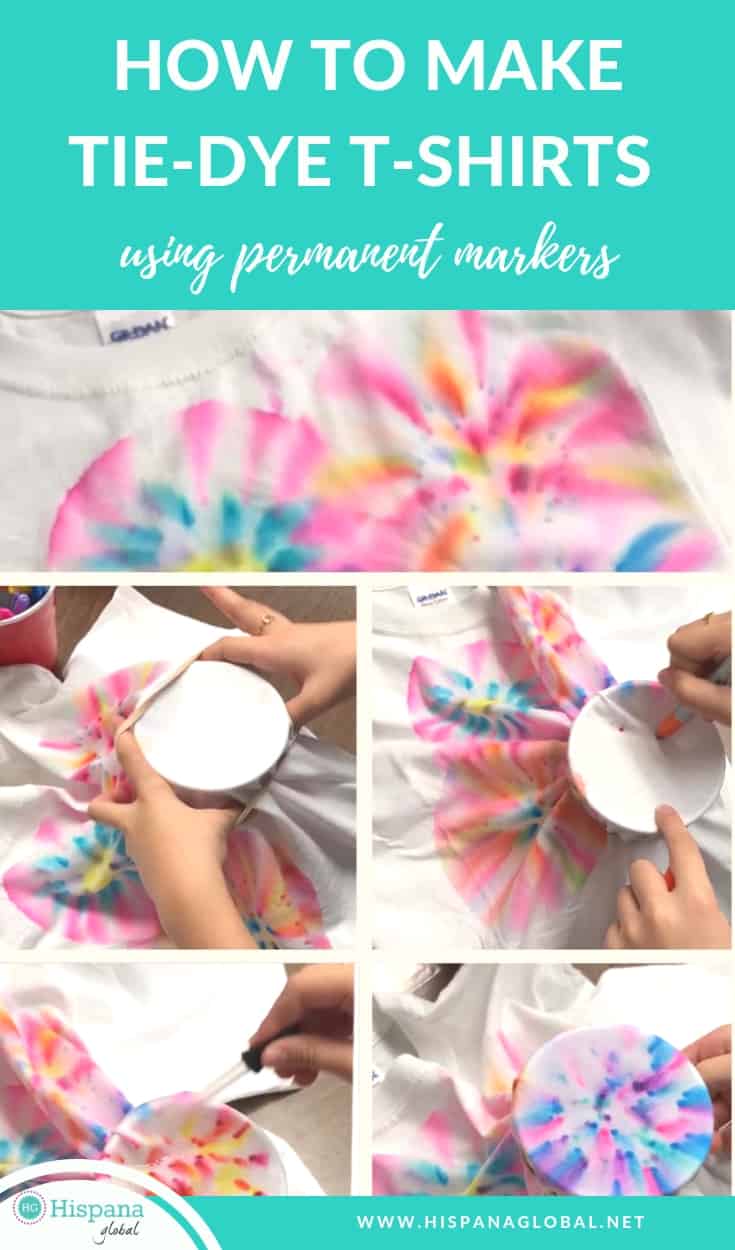
How To Make Tie-Dye Shirts With Markers
When my daughter showed me how to make tie-dye shirts with permanent markers in just minutes, I was in awe of how easy this DIY is! Sharpie tie dye shirts are the perfect activity for a rainy day, a birthday party or anytime you want to have fun with your kids. Plus, tie-dye is so on trend!
It’s really cool to see how the bright colors start bleeding into the fabric and making different shapes after using the secret ingredient: rubbing alcohol. Just a few drops of alcohol on top of the designs created with sharpie markers can create magic. It really is a fun project that requires minimal parental supervision.
To get started, gather the following materials: a white t-shirt, permanent markers (such as Sharpies), rubbing alcohol, plastic cups, and rubber bands. You might also want to keep paper towel handy in case you spill some of the alcohol.
Sharpie Tie Dye T-shirts Instructions
Here’s a step-by-step guide on how to make tie-dye t-shirts with markers and rubbing alcohol:
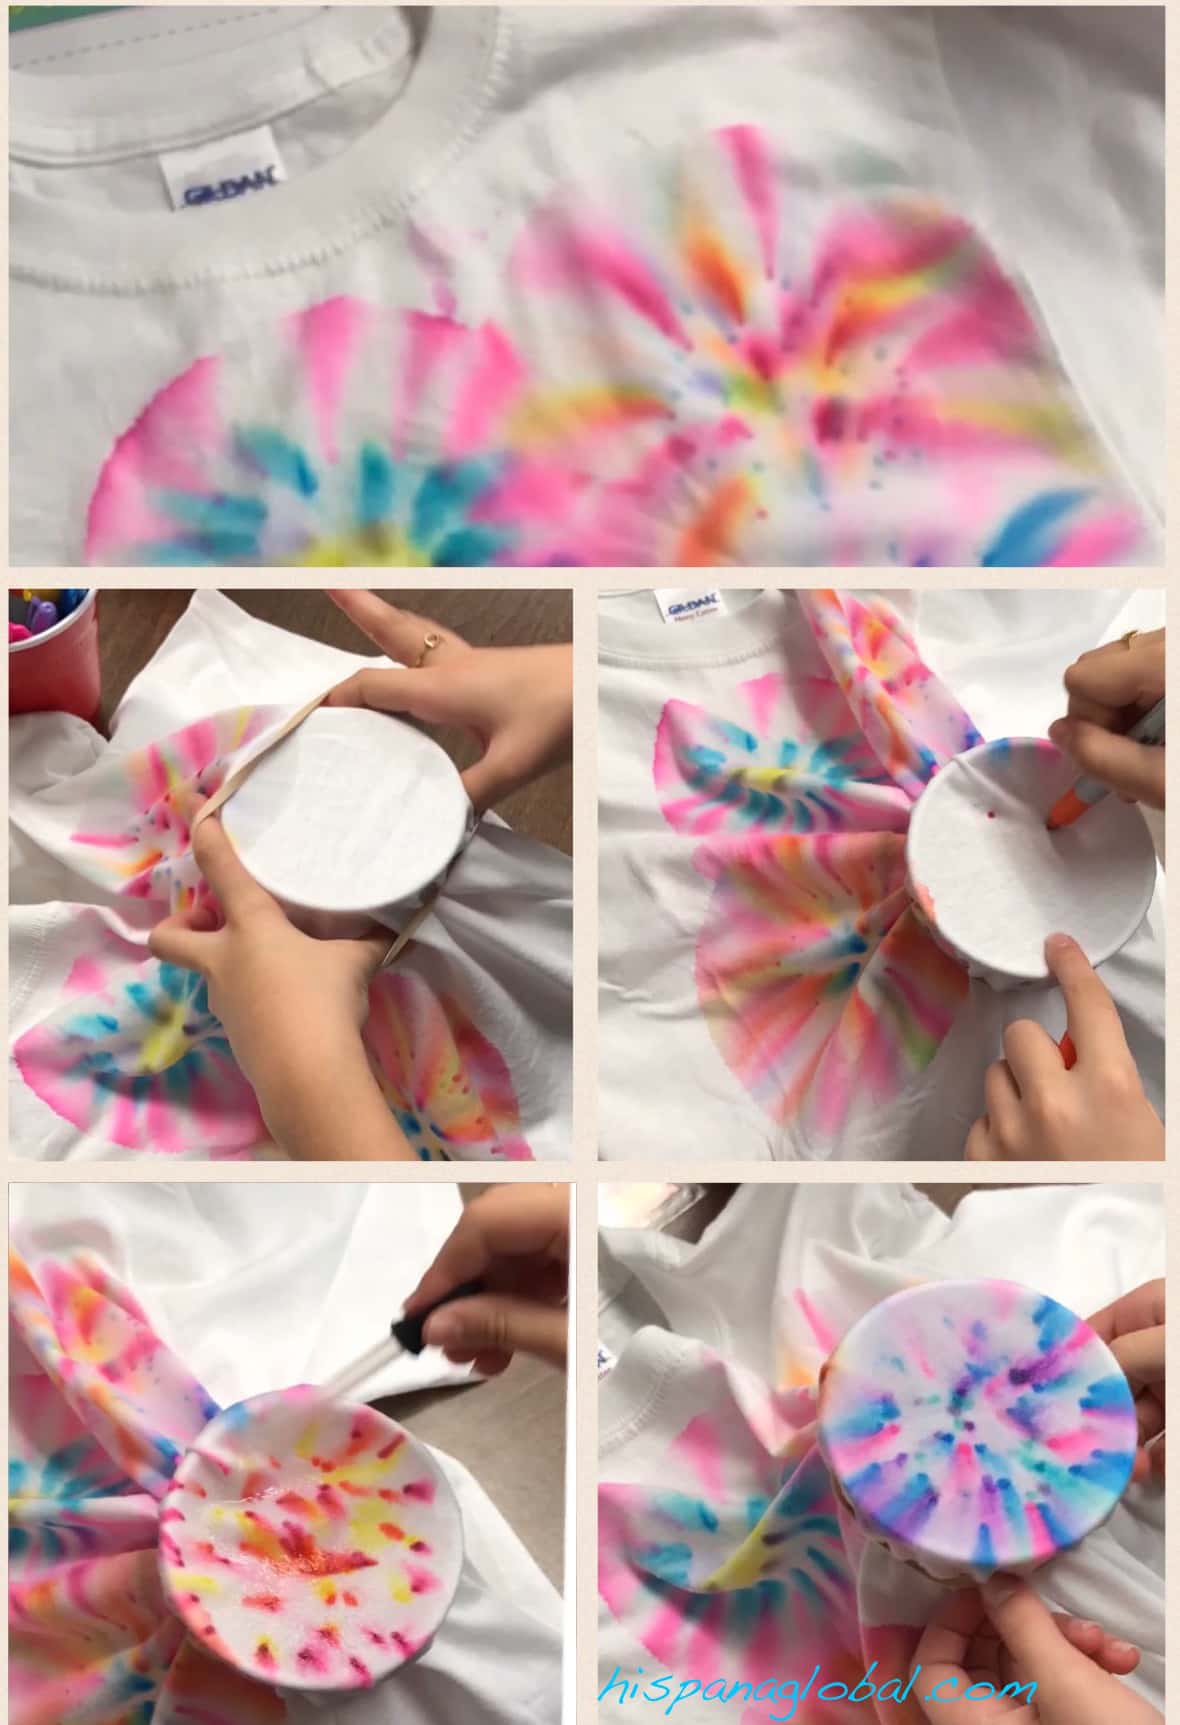
- Prepare the shirt: Place a plastic cup under the shirt, positioning it where you want the tie-dye effect to appear. Secure the cup in place by wrapping an elastic around the shirt and cup, ensuring it stays in position throughout the process.
- Create colored dots: Take the permanent markers and start painting colored dots on the fabric. Get creative with your color choices and patterns. You can make small dots, large dots, or a combination of both. The more dots you create, the more vibrant and intricate your tie-dye design will be.
- Apply alcohol: Now comes the magical step. Using a dropper (if available), apply rubbing alcohol directly over the sharpie ink colored dots on the shirt. The alcohol will cause the colors to spread and bleed, resulting in a tie-dye effect. Be sure to apply the alcohol precisely and evenly for the best results.
- Observe the transformation: As the alcohol interacts with the marker ink, you’ll notice the colors starting to blend and create beautiful shapes and patterns on the fabric. This bleeding effect is what makes tie-dyeing with markers so captivating and unique. Young kids love watching the beautiful designs come to life.
- Move the cup and repeat: Once you’re satisfied with the design in one area, carefully release the elastic and move the plastic cup to another section of the shirt. This allows you to create tie-dye patterns all over the garment. Repeat the process of painting colored dots and applying alcohol until you’ve covered the entire shirt or achieved the desired look. It’s okay to have white space.
- Set the colors: To ensure the longevity of your tie-dye design, it’s important to set the colors. Place the finished t-shirt in a dryer without any fabric softener and run it through a regular drying cycle. The heat will help the colors bond with the fabric, preventing them from fading or washing out easily.
Now you have a fabulous tie-dye t-shirt created with markers and rubbing alcohol! Enjoy showing off your unique design and let your creativity shine.
Is this tie dye technique only for t-shirts?
Nope, this DIY activity is not limited to white t-shirts alone. You can also experiment with tie-dyeing cotton tank tops, cotton towels, sheets, pillow covers or other fabric items using the same markers and alcohol technique. Let your imagination run wild, and have a blast creating one-of-a-kind Sharpie tie-dye pieces with your kids or friends.
Can I use a spray bottle instead of a dropper?
If you want less defined tie dye designs, you may use a spray or squirt bottle with rubbing or isopropyl alcohol instead of a dropper. The colorful design will show a wider color spread and more of a watercolor effect.
Pro tip
For best results, make sure to create a dime-sized color spot with the permanent marker ink.
How to make tie-dye t-shirts with markers
Check out this video which shows what you need to do to get this tie-dye effect simply using Sharpies or permanent markers and rubbing alcohol. You will need a plastic cup, a white t-shirt, and a rubber band as well. If you have a dropper, use it, because it allows you to apply the alcohol precisely over the colored dots.
You will need:
- A white t-shirt, shirt or t-shirt
- Permanent markers (we used Sharpies)
- Alcohol
- Plastic cup
- Rubber bands or elastic ties
Instructions:
- Put a plastic cup under the shirt and secure it with a rubber band.
- Paint colored dots with the permanent markers.
- Apply alcohol over the dots using a dropper.
- You will see the colors begin to bleed. That is the goal!
- Release the elastic and then move the plastic cup to another section of the shirt.
- Repeat the process until you are happy with the design.
- Finally, set the colors by putting the t-shirt in the dryer.
Thanks for watching my video! Please like and subscribe so I can keep making more 🙂
Check out the Hispana Global YouTube channel for more fun ideas!
More activities for kids
- How To Make Slime At Home
- Easy Craft For Kids: Toilet Paper Roll Corn Cob
- Craft For The Day Of The Dead: Paper Plate Skull
- Back To School DIY: Washi Tape Notebooks and Pencils